DJI Mini 4 Pro Obstacle Avoidance Not Working — How to Fix It
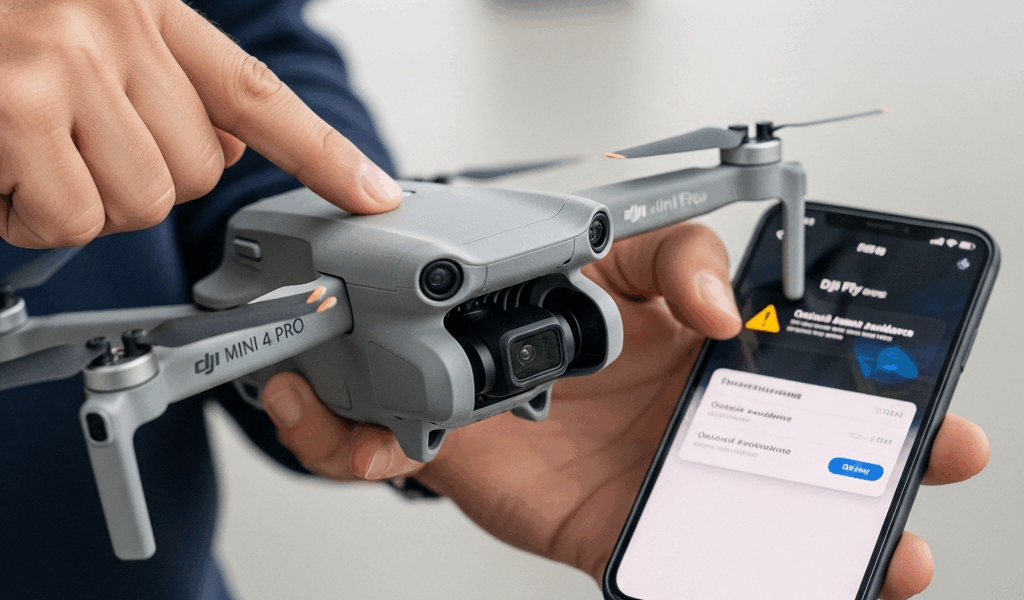
If your DJI Mini 4 Pro obstacle avoidance not working is the problem that sent you here, I’ve been exactly where you are — standing in a field, drone in the air, flying straight toward a tree line with zero warning. Panic-inducing. The Mini 4 Pro has one of the best obstacle avoidance systems DJI has put into a sub-250g drone, with omnidirectional sensing across front, rear, lateral, and upward directions. But it fails silently sometimes, and the error isn’t always obvious. I’ve spent probably 40+ hours troubleshooting this across two units and dozens of forum threads, and I’ve consolidated everything that actually works into this guide.
Let’s get into it. No fluff.
Check These Settings First
Probably should have opened with this section, honestly — because the majority of cases where obstacle avoidance seems broken are just a settings issue. Took me embarrassingly long to figure this out the first time.
Visual Navigation Settings Toggle
Open DJI Fly. Connect to your Mini 4 Pro. Tap the three-dot menu icon in the top-right corner to enter Safety settings. Scroll down and look for Visual Navigation Settings. There’s a master toggle at the top of that submenu. If it’s off, every single obstacle avoidance function is disabled — APAS, braking, everything. Just off. No warning, no indicator on the main flight screen that anything is wrong.
Tap it on. Done. That’s it for a significant chunk of people reading this.
Inside that same menu, you’ll see options for setting obstacle avoidance behavior to Bypass, Brake, or Off. Brake makes the drone stop when it detects something. Bypass activates APAS 5.0, which attempts to fly around obstacles autonomously. Off disables detection entirely during manual flight. Make sure you have it set to Brake or Bypass depending on your preference.
Flight Mode — The Hidden Culprit
This one gets people constantly. When you’re in Sport Mode, obstacle avoidance is completely disabled. That’s not a bug. DJI made that intentional choice because Sport Mode unlocks higher speeds — up to 54 kph on the Mini 4 Pro — and the sensor processing can’t keep up with obstacle detection at those velocities reliably.
Check the flight mode indicator on the left side of your DJI Fly main screen. If it says “S,” you’re in Sport. Switch to Normal or Cine mode by toggling the physical switch on the RC-N2 controller (or through the on-screen mode selector on the RC 2). Obstacle avoidance immediately re-enables in Normal mode.
I once flew an entire 20-minute session in Sport mode wondering why nothing was triggering. Landed, noticed the S indicator. Sometimes it’s that simple and that frustrating.
Tripod Mode and ActiveTrack Behavior
In Tripod Mode (part of the special flight modes accessible through the function menu), obstacle avoidance is active but operates at reduced sensitivity thresholds. The drone moves slowly enough that braking distances are short. This is fine. But if you’re in certain QuickShot modes like Dronie or Circle, APAS Bypass is temporarily suspended — the drone follows its programmed path. Brake is still active though, so it will stop if something gets too close. Worth knowing.
Firmware Update Fix
Firmware is the second thing to check. Not first — settings are first. But firmware issues have caused real, documented obstacle avoidance malfunctions on the Mini 4 Pro, and the fix is straightforward.
How to Check Your Current Firmware
In DJI Fly, tap the three-dot menu, go to About, and check the firmware version listed under your aircraft. As of mid-2024, the stable firmware is version 01.00.0500 or later. Earlier versions — particularly builds in the 01.00.02xx range — had documented false positive alerts where the sensors would trigger braking with nothing nearby, and also cases where sensors would stop reporting entirely after a hard landing.
Frustrated by repeated false brake events mid-flight, several Mini 4 Pro owners (myself included) updated firmware expecting to lose features, and instead gained stability. The 01.00.0500 build specifically addressed vision sensor communication errors that appeared inconsistently in cold weather below about 10°C / 50°F.
Updating via DJI Fly App
Connect your drone and controller to the DJI Fly app. If an update is available, a blue banner appears at the top of the main camera screen saying “New firmware available.” Tap it. Follow the prompts. The update takes roughly 8 to 12 minutes depending on your internet connection speed and transfers to the drone over the RC link — no USB cable needed during an OTA update.
Make sure your drone battery is above 50% before starting. Below that threshold, DJI Fly refuses to initiate the update, which is smart. A failed mid-update power loss can brick the aircraft, and a replacement Main Controller board from DJI’s repair service runs around $140 USD.
Updating via DJI Assistant 2
If the in-app update fails or gets stuck, use DJI Assistant 2 (Consumer Drones Series) on a Windows or Mac computer. Connect the Mini 4 Pro via USB-C cable to the aircraft’s charging port. Open Assistant 2, log into your DJI account, select your aircraft from the device list, and go to Firmware Update. From here you can also force-install a specific firmware version if you need to roll back to a previous build — useful for diagnosing whether a recent update introduced an issue.
Sensor Calibration
Calibration is where people skip steps and then wonder why things still feel off. There are two levels here: the automatic self-calibration the drone does on its own, and the manual calibration through DJI Assistant 2.
Automatic Self-Calibration After Takeoff
The Mini 4 Pro’s vision and infrared sensors self-calibrate during the first 1 to 3 minutes of each flight. The process runs in the background. For it to work correctly, fly at a low altitude — between 2 and 6 meters — over an area with visual texture. Grass, gravel, pavement, anything with contrast and pattern. Flat, featureless surfaces like smooth concrete or still water interfere with the visual odometry system and can produce an incomplete calibration that carries through the rest of the flight.
Hover in place for 30 to 60 seconds, then do a slow, wide circle. The sensors log environmental data during this time. Cold boot the drone in an open area, not inside or near buildings, and keep it away from strong radio sources during this window.
Manual Calibration via DJI Assistant 2
If obstacle avoidance feels sluggish, triggers inconsistently, or you’re seeing a “Vision System Error” warning that clears after a few flights but keeps coming back, run a manual calibration.
Connect the Mini 4 Pro to DJI Assistant 2 via USB-C. Navigate to Tools > Sensor Calibration. You’ll see options for IMU calibration and Vision Sensor calibration separately. For obstacle avoidance specifically, run the Vision Sensor calibration. It walks you through a series of positioning steps where you tilt and rotate the drone according to on-screen prompts — similar to IMU calibration. The whole process takes about 4 minutes.
Do this on a stable surface, away from vibrations, with the battery fully charged. I run this after any hard landing where the drone hit the ground at more than a gentle bounce. Shock can shift the sensor alignment slightly, and even a small offset affects detection range accuracy.
Environmental Causes
Sometimes the obstacle avoidance isn’t broken. The environment is just outside what the sensor system can handle. These are not malfunctions.
Low Light Conditions
The Mini 4 Pro uses a downward and forward-facing visual sensor array that relies on ambient light. In low-light conditions — dawn, dusk, heavy overcast, or indoor environments — the vision system degrades significantly. DJI Fly will display a “Visual Navigation Unavailable” warning when light drops below usable thresholds. At that point, obstacle detection falls back to the infrared sensors for close-range braking (within about 0.5 to 8 meters), but APAS bypass stops functioning.
This is expected behavior. Fly more conservatively in low light. Obstacle avoidance is not a substitute for situational awareness regardless of conditions.
Smooth, Featureless, or Reflective Surfaces
Flying over water, snow, or glass surfaces disables downward visual positioning, and can cause irregular behavior in the horizontal sensors as well. Reflective surfaces scatter infrared signals unpredictably. The drone may fail to detect an obstacle reflected in a glass building. It may also false-trigger on its own reflection over still water.
Direct sunlight aimed straight into a forward-facing sensor causes temporary blindness in that sensor axis. This is most common during low-angle morning or afternoon sun. Rotate your flight path so you’re not flying directly toward the sun at low altitude.
Rain, Fog, and Condensation
The Mini 4 Pro is not rated for any water resistance. Beyond the obvious risk to electronics, water droplets on sensor lenses cause visual processing errors that kill obstacle detection. Even light mist can coat the sensor glass within a few minutes of flight. Wipe the lenses before every flight with a microfiber cloth — the same type used for camera lenses, not paper towels.
Hardware Issues — When to Contact DJI
If you’ve worked through every section above and obstacle avoidance still doesn’t function, the problem may be physical.
Vision System Error Messages
A persistent “Vision System Error” or “Obstacle Avoidance Sensor Error” message that doesn’t clear after calibration and firmware update points to a hardware fault. This error appears in the safety notifications panel within DJI Fly. Screenshot it. Note whether it appears at boot or only after flight time.
Physical Sensor Damage and Debris
Inspect all sensor windows visually. The Mini 4 Pro has sensor clusters on the front (two lenses), rear (two lenses), left side, right side, top (infrared), and bottom. Look for cracks, deep scratches, or clouding in the lens material. Even hairline cracks can cause sensor malfunctions that don’t show up as obvious physical damage in a quick glance. Use a flashlight and look at an angle.
Also check for debris — dried mud, dust, or plant material packed into the sensor housing gaps. A soft brush or compressed air (used carefully, not directly blasting into electronics openings) can clear surface debris without risk. Do not use cleaning solvents on sensor lenses — use only dry microfiber or a lens cleaning pen rated for optical surfaces.
The RMA Process
If damage is confirmed or errors persist after all software-side fixes, submit a repair request through DJI’s official support portal at support.dji.com. Select your aircraft model, describe the issue, and attach flight logs — DJI Fly stores logs locally on your device under the “Me” tab, then “Flight Records.” These logs are critical for DJI’s diagnostic process and can determine whether a repair falls under warranty.
Standard DJI Care Refresh for the Mini 4 Pro (purchased within 48 hours of drone activation) covers sensor replacements. Without Care Refresh, sensor repair costs vary — a full forward vision sensor replacement through DJI’s service center typically runs between $80 and $120 USD depending on labor and parts availability in your region.
Get the drone to DJI rather than attempting to replace vision sensors yourself. The sensor alignment tolerances are tight enough that a DIY replacement almost always results in continued degraded performance even with new hardware.

Stay in the loop
Get the latest light drones updates delivered to your inbox.